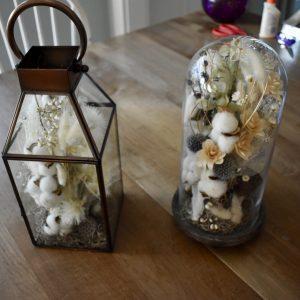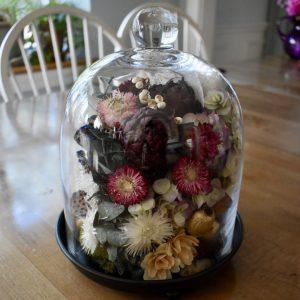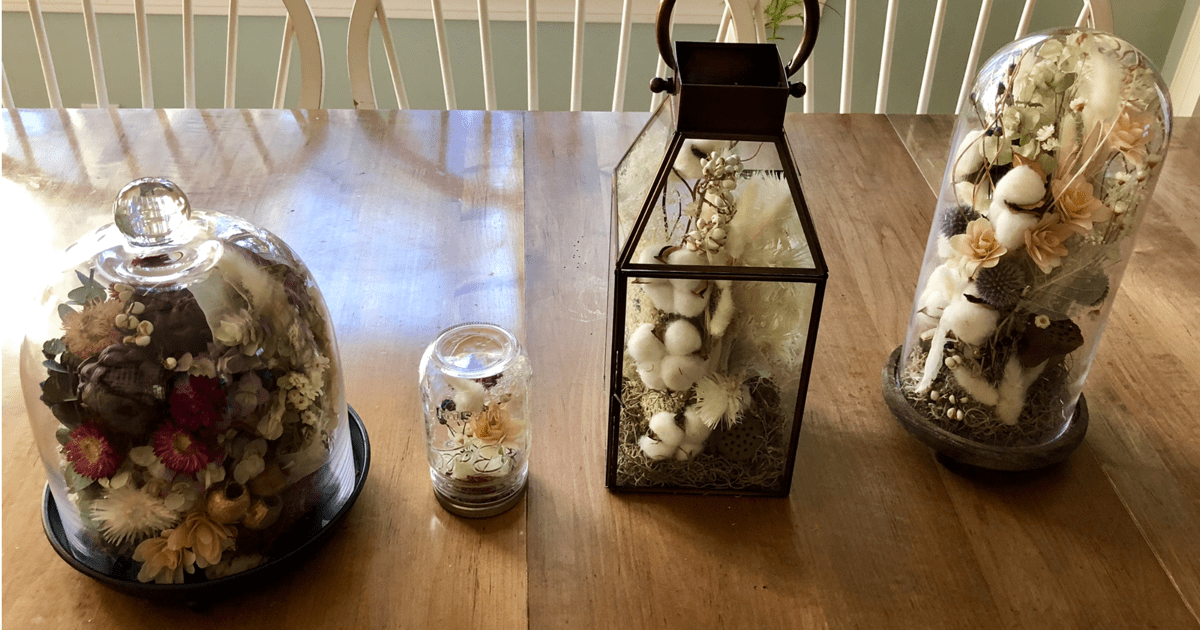
Writing can be an intense and tiring job. It requires a lot of mental endurance and also a LOT of sitting. When I need a mental break from the rigor of writing, I love to dabble in arts and crafts. Craft projects are a great stress-reliever for me, and are also great activities to do indoors as the weather outside turns colder. This fall, some family friends and I did some artistic experimentation with glass lanterns, cloches, and dried flowers. It was so much fun, and the results were so great, that I wanted to share the how-to here.
There’s no “wrong” way to approach this project, because you can easily cover any areas of your project you’re not happy with by adding more flowers. You can purchase supplies to make your own decorated lantern or glass cloche. Or you can collect objects from outdoors in nature. You can also turn empty mason jars, pasta jars, or jelly jars into works of art with this same technique. Use whatever materials you have on hand, and, most importantly: Have fun!
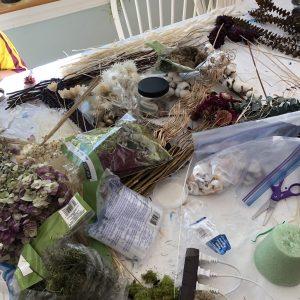
Here are the materials we used:
*glass cloches and a glass lantern purchased at bargain prices from Michaels Craft Store and Christmas Tree Shops
*styrofoam cones trimmed to fit inside the glass containers
*glue guns and glue sticks
*small green craft wire
*scissors
*variety of dried flowers, seed pods, and dried grasses (these can be found in your backyard, or ordered online from dried flower suppliers such as Afloral)

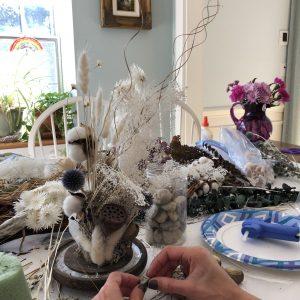
Here are the steps we took to make our decorative dried flower “sculptures” (I just threw that in there to make it sound fancy!):
- We trimmed the tops of our styrofoam cones so that they would fit inside of our glass containers. We only wanted them to be about half of the height of the container. This way, we still had enough room to glue flowers and seed pods to the tops of the styrofoam.
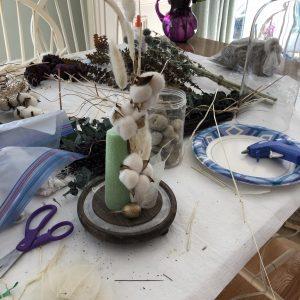
- Using the glue guns, we began gluing flowers, grasses, and pods to the styrofoam, layering them until we can a “bouquet” built around the foam center.
As we glued, we occasionally checked to be sure that our bouquet could still fit inside of our containers by placing the glass domes over top.
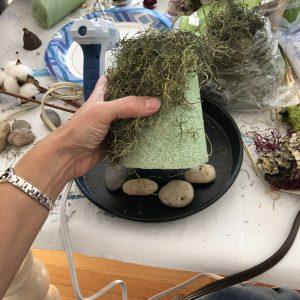
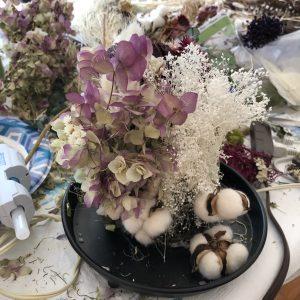
3. After we were finished with our center bouquet, we added dried moss and/or rocks around the base of the bouquet. We didn’t need to glue the foam to the base of the containers because our bouquets were so full they brushed the sides of the glass. But if your bouquet is narrower, you can glue it to your base to stabilize it.
4. We carefully placed the glass domes over the tops of our bouquets (or, in the case of the lantern, simply shut the lantern door!). We had so much fun making these, and they turned out beautifully. If you’re feeling very ambitious, you can switch out your bouquets for various seasonal holidays, too.
We were thrilled with our finished products, too!