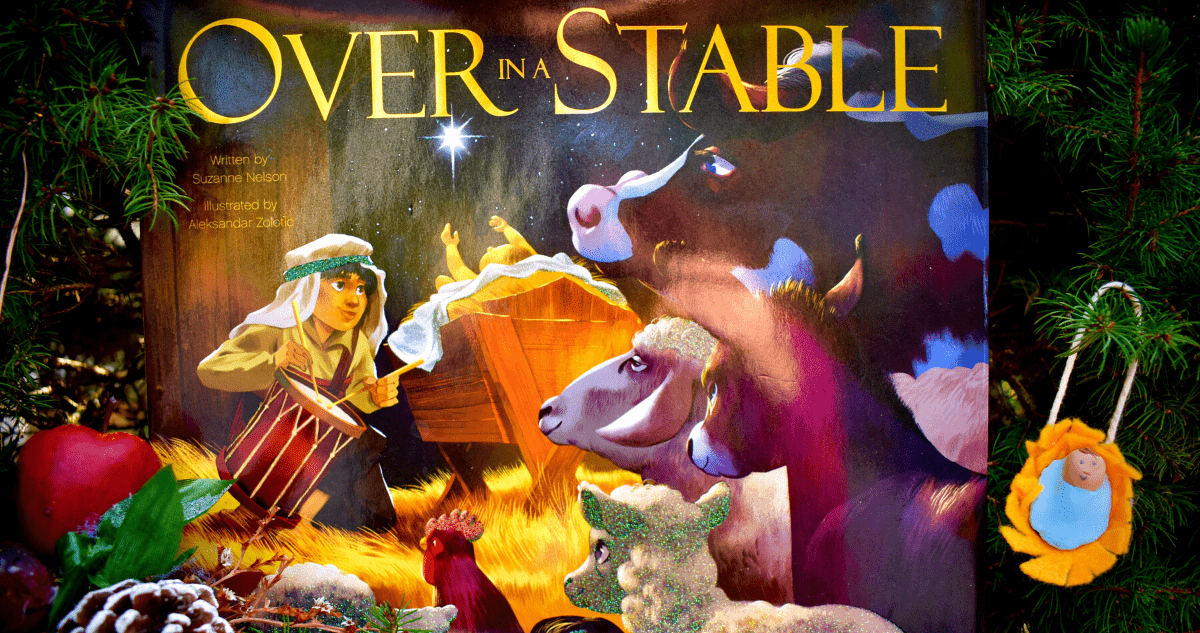
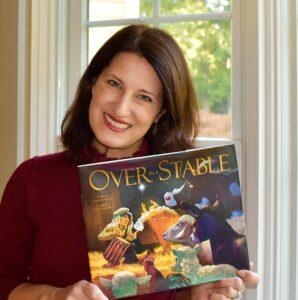
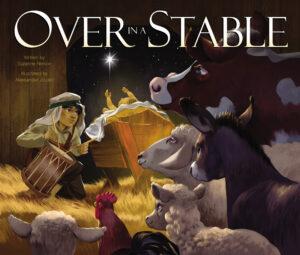
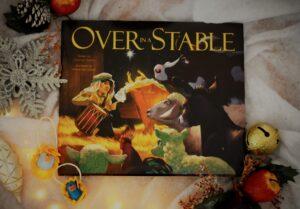
My debut picture book with Zonderkidz, Over in a Stable, came out a week ago!
(You can order a copy of Over in a Stable here)
I’m thrilled to share this Christmas counting book with young readers. It introduces counting from one to ten through all of the creatures and people gathered to celebrate the very first Christmas.
Because we could all use a little Christmas cheer right now, here’s a fun and easy how-to for making your own special ornament.
When I was in preschool, I made an ornament like this one, and my mom kept it for decades. Even long after I’d grown up and had children of my own, she hung my walnut manger ornament on her family tree.
I still have a vivid memory of making the ornament, which is why I wanted to share this craft with all of you.

Here’s a video how-to, followed by step-by-step instructions below:
Supplies You’ll Need
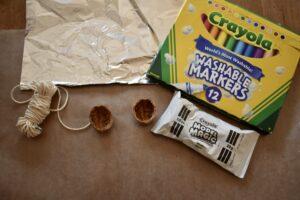
- Half of a walnut shell, or the bottom of a small cardboard jewelry box to make your manger
- Aluminum foil
- A small square of yellow felt
- Twine or festive ribbon for making an ornament hanger
- Crayola Model Magic air dry clay (Or, if you have colored Sculpey clay or homemade salt dough, that works too)
- Crayola markers (You’ll only need these if you’re using Model Magic clay)
- A glue gun and glue sticks
Making Your Ornament
Directions:
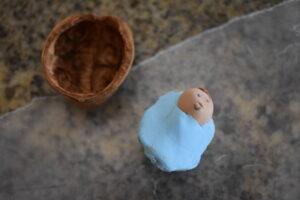
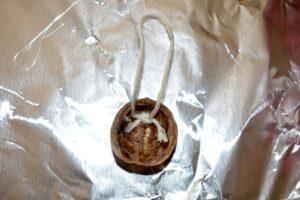
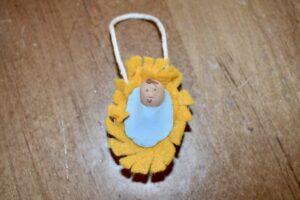
First, line your walnut shell or box bottom with a small piece of aluminum foil. This will keep your clay from sticking to the shell before you’re ready to glue it into place. This will also help you shape your clay into the right size to fit your walnut shell or box.
Getting your manger ready
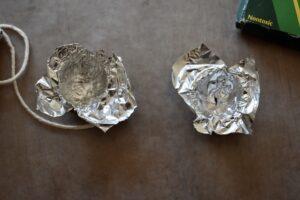
Make sure to leave a lip around the edge of your shell, so that you can lift your clay mold out later on.
Molding your baby with clay
Next, use your clay to make your baby Jesus.
If you’re using Model Magic clay, you can easily color the clay with markers. Make sure to mix the color into the clay by kneading it with your fingers.
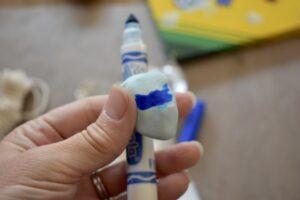
Using washable markers will help the color wash right out of your fingers afterwards.
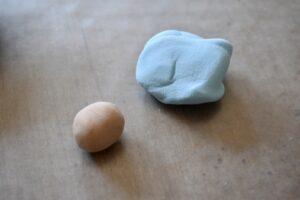
I used a blue marker for the swaddling cloth, and a brown color for Jesus’s head.
If you’re using Sculpey clay, you can use colorized clay to create your baby for the ornament.
With salt dough, you can use food coloring to add colors.
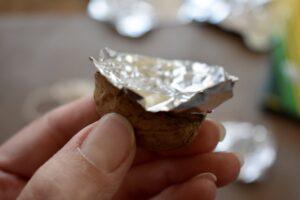
Now, you can mold your clay into your shell or box to make the shape of the baby.
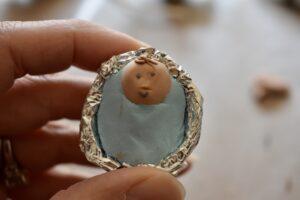
Once you’re happy with the way your baby looks and he fits well into the shell or box, you can carefully lift him out. Holding onto the edges of the aluminum foil, gently lift the baby and the foil out of the shell.
Then, take the baby out of the aluminum foil to let it air dry for 72 hours.
(Note: If you’re using Sculpey clay or salt dough, follow the baking and/or curing instructions for each.)
Making the hay for the manger
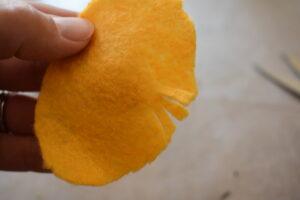
While your clay is drying, you can make the hay for your manger.
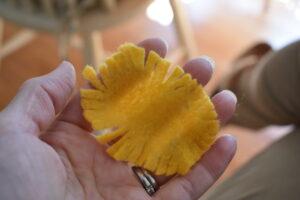
First, cut a small oval of felt, making sure it fits into your shell or box with a little bit sticking up from the sides.
Next, cut small slits all the way around the felt, making a border.
Putting the ornament together
Note: You will need an adult for this next step. When using a glue gun, remember that the glue and the tip of the glue gun get extremely hot. Use extreme caution when operating a glue gun and use one only with with the help of an adult.
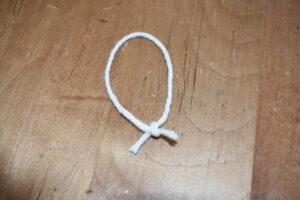
Take your piece of ribbon or twine (around 4-6 inches long) and tie a knot at the bottom. The loop will become the hanger for your ornament.
Now, using a glue gun or craft glue, attach the bottom of the hanger to the inside top of your shell or box.
Next, glue your felt hay into the bottom of the shell or box. The edges of the hay will stick up.
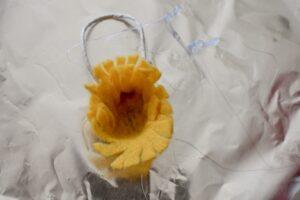
Last but not least, glue the baby into the hay.
Finally, find a special spot on your Christmas tree to hang your ornament!
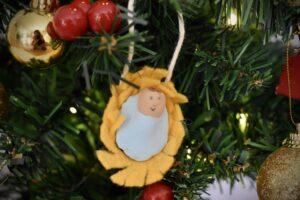
Then, curl up on your couch to read Over in a Stable and celebrate the very first Christmas!
More fun Christmas crafts
OVER IN A STABLE Nativity Nightlight craft